|
|
|
|
Fibonacci.h and Fibonacci.cpp define a class Fibonacci that can be used to extract a series of Fibonacci numbers
|
|
|
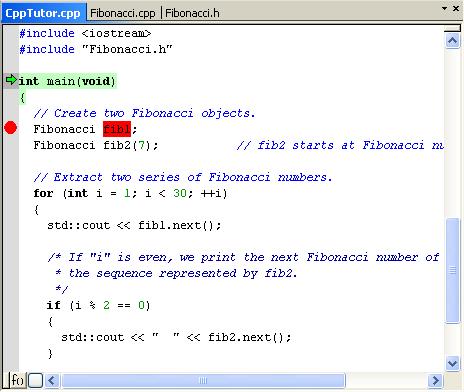
CppTutor.cpp creates two objects, fib1 and fib2, from the class Fibonacci and extracts two sequences of Fibonacci numbers using the Fibonacci class.
|
|
1
|
|
2
|
|
3
|
Choose Project>Options and make sure these options are selected:
|
|
4
|
Choose Project>Make to compile and link your application.
|
|
5
|
Choose Project>Debug to start C-SPY.
|
|
2
|
To see how the object is constructed, set a breakpoint on the C++ object fib1 on this line:
|
|
3
|
|
4
|
To step into the constructor, choose Debug>Step Into or click the Step Into button in the toolbar. Then click Step Out again.
|
|
5
|
Step Over until the line:
|
|
6
|
Use the Go to function button
|
|
7
|
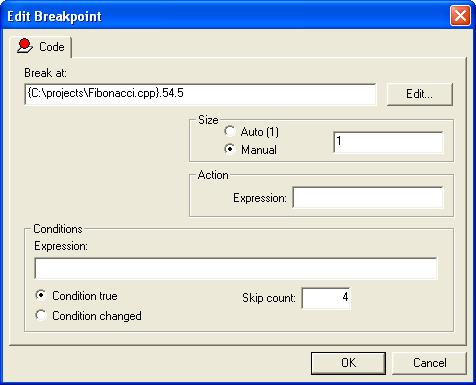
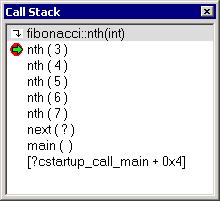
It can be interesting to backtrace the function calls a few levels down and to examine the value of the parameter for each function call. If you add a condition to the breakpoint, the break will not be triggered until the condition is true, and you will be able to see each function call in the Call Stack window.
|
|
8
|
Choose Debug>Go to execute the application until the breakpoint condition is fulfilled.
|
|
9
|
When C-SPY stops at the breakpoint, choose View>Call Stack to open the Call Stack window.
|
|
1
|
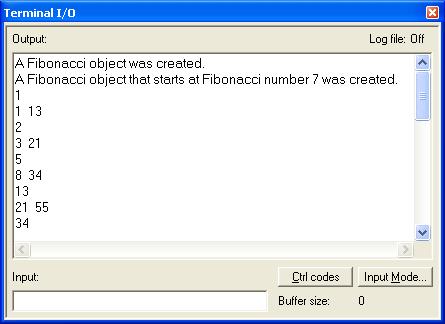
Open the Terminal I/O window from the View menu.
|
|
2
|
Remove the breakpoints and run the application to the end and verify the Fibonacci sequences being printed.
|